
【テーマ作成 その③】つづき。
投稿内容等を表示させるようにテンプレートタグを書いていきます。
サンプルデータとしてテストデータ(過去記事参照)をあらかじめ突っ込んでおくといいです。
※ソースコード貼ってるところの先頭行に -が付いてるのは削除行、+が付いてるのは追加行になります。
index.php ループ
現時点ではテーマ、何一つWordPressで追加した投稿・ページ等出力されません。
ので、そのへんを。
The Loop、ループ処理について
ループで投稿を表示するためにWordPressで使用するphpコードですな。
一番ポピュラーなのがこの形、投稿があれば表示設定で設定した最大数分回ります。
<?php if ( have_posts() ) : ?>
	<?php while ( have_posts() ) : the_post(); ?>
		<!-- ここでループ処理 -->
	<?php endwhile; ?>
<?php endif; ?>
if や while は基本的なプログラム構文ですね。
index.php にループを追加
index.php を開いて、↑のループを記述してみます。
<?php
/**
 * メインのテンプレートファイル
 *
 * WordPressテーマに必要な2つのテンプレートファイルのうち最も基本的なもの(もう一つは style.css)。
 * 特定のクエリに一致しない時にページを表示するため読み込まれる。
 * 例: home.phpファイルが存在しない時に使われる。
 * 詳しくは Codex へ: http://codex.wordpress.org/Template_Hierarchy
 *
 * @package    WordPress
 * @subpackage Hoho
 */

get_header(); ?>

<div class="main wrapper clearfix">

	<?php if ( have_posts() ) : ?>
		<?php while ( have_posts() ) : the_post(); ?>

			<article>
				~ 省略 ~
			</article>

		<?php endwhile; ?>
	<?php endif; ?>

	<?php get_sidebar(); ?>

</div>
<!-- #main -->

<?php get_footer(); ?>
ループ内に the_excerpt を記述
the_excerpt は記事の抜粋を出力する関数。
記事全文を出力する the_content もありますね、the_content はおいおい作る single.php や page.php で使います。
diff --git a/index.php b/index.php
--- a/index.php
+++ b/index.php
@@ -25,14 +25,9 @@
 					<p>Lorem ipsum dolor sit amet, consectetur adipiscing elit. Aliquam sodales urna non odio egestas tempor. Nunc vel vehicula ante. Etiam bibendum iaculis libero, eget molestie nisl pharetra in. In semper consequat est, eu porta velit mollis nec.</p>
 				</header>
 				<section>
-					<h2>article section h2</h2>

-					<p>Lorem ipsum dolor sit amet, consectetur adipiscing elit. Aliquam sodales urna non odio egestas tempor. Nunc vel vehicula ante. Etiam bibendum iaculis libero, eget molestie nisl pharetra in. In semper consequat est, eu porta velit mollis nec. Curabitur posuere enim eget turpis feugiat tempor. Etiam ullamcorper lorem dapibus velit suscipit ultrices. Proin in est sed erat facilisis pharetra.</p>
-				</section>
-				<section>
-					<h2>article section h2</h2>
+					<?php the_excerpt(); // 記事の抜粋を表示 ?>

-					<p>Lorem ipsum dolor sit amet, consectetur adipiscing elit. Aliquam sodales urna non odio egestas tempor. Nunc vel vehicula ante. Etiam bibendum iaculis libero, eget molestie nisl pharetra in. In semper consequat est, eu porta velit mollis nec. Curabitur posuere enim eget turpis feugiat tempor. Etiam ullamcorper lorem dapibus velit suscipit ultrices. Proin in est sed erat facilisis pharetra.</p>
 				</section>
 				<footer>
 					<h3>article footer h3</h3>
the_title, the_time, the_category の記述
Codex曰く入れといた方がいいよ、ってことなんで記述。
それぞれループ内でのみ使える関数です。
- the_title…記事タイトルを出力
- the_time…投稿日を出力
- the_category…記事のカテゴリまたはカテゴリへのリンクを出力
見た目を整えるのは後回し、htmlタグや css の説明はスルー。
フレームワークに元々書いてあったダミーテキスト部分を消して書き変えるとこんな感じに。
~略~
			<article>
				<header>

					<h1><?php the_title(); ?></h1>

					<time><?php the_time( 'Y.n.j.' ); ?></time>

				</header>
				<section>

					<?php the_excerpt(); // 記事の抜粋を表示 ?>

				</section>
				<footer>

					<?php the_category(); ?>

				</footer>
			</article>
~略~
the_time の引数は phpの当該ドキュメントを参照。
本来は多言語化できる書き方にしたほうがいいのですが説明めんどくさいため一旦これで。
トップページにアクセスしてみると、無事ループが。
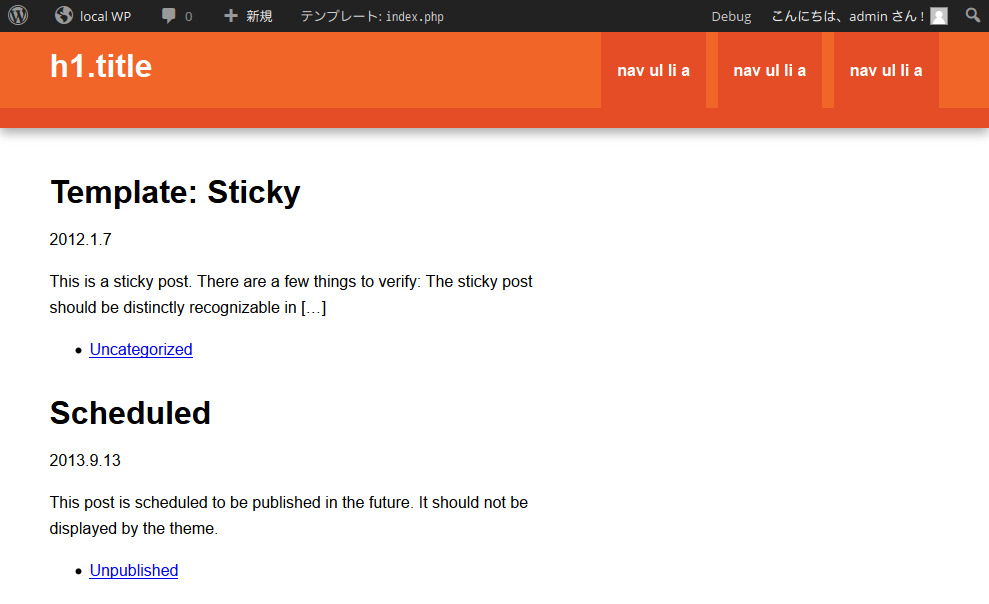
このループで一応、日付別アーカイブやカテゴリアーカイブもリンク次第で勝手にループしてくれます。
記事の要素に <?php post_class(); ?> を付ける
投稿のスタイルを css で制御したいときに使う。
ループ内のhtmlタグに追加すれば、投稿タイプに応じたクラスが付加される関数。
記事をくくってる <article> なhtml5タグのところに付けておく。
-			<article>
+			<article <?php post_class(); ?>>
ループ部分をテンプレート化
ループ部分ができました、ただこのままでは使い回せないので、ループ部分をテンプレート化します。
テンプレート化って難しそうですけどなんてことはなく、ただファイルを分けて、分けたファイルを読み込むだけです。簡単!
コンテンツ部分を分けるのでファイル名 content.php を作成。
index.php から該当部分をまるごとコピー。
<?php
/**
 * コンテンツループのテンプレートファイル
 *
 * ループを条件別に
 *
 * @package    WordPress
 * @subpackage Hoho
 */
?>

<?php if ( have_posts() ) : ?>
	<?php while ( have_posts() ) : the_post(); ?>

		<article <?php post_class(); ?>>
			<header>

				<h1><?php the_title(); ?></h1>

				<time><?php the_time( 'Y.n.j' ); ?></time>

				<?php the_category(); ?>

			</header>
			<section>

				<?php the_excerpt(); // 記事の抜粋を表示 ?>

			</section>
			<footer>

				<?php the_tags(); ?>

			</footer>
		</article>

	<?php endwhile; ?>
<?php endif; ?>
して、index.php からそれを読み込む。
 	<div class="main clearfix">

		<?php
		// content.php を読み込む
		get_template_part( 'content' ); ?>

 	</div>
 	<!-- #main -->
読み込む時は get_template_part を使うといいです。
今後 get_template_part はふんだんに使っていくことになるはずなんでおいおい。
サイドバーを調整
さて、基本的なループが実装されたのでサイドバーへ。
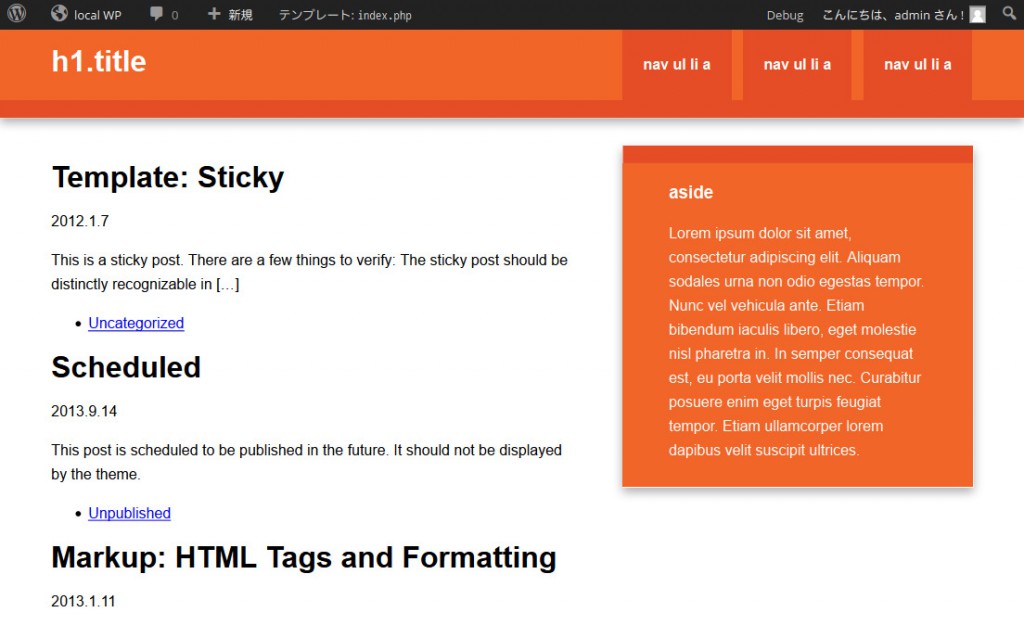
サイドバーがカラム落ちしたので直す
ループを実装してサイドバーがカラム落ちしたので直します。
変更点、多いです。
index: wrapper 内に main を移動させる
sidebar: sidebarクラスな div で全体を囲む
css: 変更したクラスとともにスタイル修正
---
 css/screen.css   | 28 ++++++++++++++++++++--------
 index.php        | 41 +++++++++++++++++++++++------------------
 sass/_768up.sass | 17 ++++++++++++-----
 sass/_main.sass  | 14 +++++++++++---
 sidebar.php      | 13 +++++++++----
 5 files changed, 75 insertions(+), 38 deletions(-)

diff --git a/css/screen.css b/css/screen.css
index 24538c4..526c403 100644
--- a/css/screen.css
+++ b/css/screen.css
@@ -77,13 +77,13 @@ body {
 }

 .footer-container,
-.main aside {
+.sidebar aside {
   border-top: 20px solid #e44d26;
 }

 .header-container,
 .footer-container,
-.main aside {
+.sidebar aside {
   background: #f16529;
 }

@@ -118,13 +118,18 @@ nav a:hover {
 /* ==============
  *  MOBILE: Main
  * ============== */
-.main {
+.main-container {
   padding: 30px 0;
 }
+
 .main article h1 {
   font-size: 2em;
 }
-.main aside {
+
+/* =================
+ *  MOBILE: Sidebar
+ * ================= */
+.sidebar aside {
   color: white;
   padding: 0 5% 10px;
 }
@@ -163,7 +168,7 @@ nav a:hover {
    *  WIDE: CSS3 Effects
    * ==================== */
   .header-container,
-  .main aside {
+  .sidebar aside {
     -webkit-box-shadow: 0 5px 10px #aaaaaa;
     -moz-box-shadow: 0 5px 10px #aaaaaa;
     box-shadow: 0 5px 10px #aaaaaa;
@@ -184,13 +189,20 @@ nav a:hover {
   /* ============
    *  WIDE: Main
    * ============ */
-  .main article {
+  .main {
     float: left;
     width: 57%;
   }
-  .main aside {
+
+  /* ===============
+   *  WIDE: Sidebar
+   * =============== */
+  .sidebar {
     float: right;
-    width: 28%;
+    width: 38%;
+  }
+  .sidebar aside {
+    padding: 0 13% 10px;
   }
 }
 @media only screen and (min-width: 1140px) {
diff --git a/index.php b/index.php
index 9efc61d..d20db78 100644
--- a/index.php
+++ b/index.php
@@ -13,37 +13,42 @@

 get_header(); ?>

-<div class="main wrapper clearfix">
+<div class="wrapper clearfix">

-	<?php if ( have_posts() ) : ?>
-		<?php while ( have_posts() ) : the_post(); ?>
+	<div class="main clearfix">

-			<article <?php post_class(); ?>>
-				<header>
+		<?php if ( have_posts() ) : ?>
+			<?php while ( have_posts() ) : the_post(); ?>

-					<h1><?php the_title(); ?></h1>
+				<article <?php post_class(); ?>>
+					<header>

-					<time><?php the_time( 'Y.n.j' ); ?></time>
+						<h1><?php the_title(); ?></h1>

-				</header>
-				<section>
+						<time><?php the_time( 'Y.n.j' ); ?></time>

-					<?php the_excerpt(); // 記事の抜粋を表示 ?>
+					</header>
+					<section>

-				</section>
-				<footer>
+						<?php the_excerpt(); // 記事の抜粋を表示 ?>

-					<?php the_category(); ?>
+					</section>
+					<footer>

-				</footer>
-			</article>
+						<?php the_category(); ?>

-		<?php endwhile; ?>
-	<?php endif; ?>
+					</footer>
+				</article>
+
+			<?php endwhile; ?>
+		<?php endif; ?>
+
+	</div>
+	<!-- #main -->

 	<?php get_sidebar(); ?>

 </div>
-<!-- #main -->
+<!-- #wrapper -->

 <?php get_footer(); ?>
diff --git a/sass/_768up.sass b/sass/_768up.sass
index 70e9bf6..36f87c5 100644
--- a/sass/_768up.sass
+++ b/sass/_768up.sass
@@ -3,7 +3,7 @@
  * ====================

 .header-container,
-.main aside
+.sidebar aside
 	@include box-shadow(0 5px 10px #aaa)

 /* ============
@@ -22,9 +22,16 @@ nav
  * ============

 .main
+	float: left
+	width: 57%
 	article
-		float: left
-		width: 57%
+
+/* ===============
+ *  WIDE: Sidebar
+ * ===============
+
+.sidebar
+	float: right
+	width: 38%
 	aside
-		float: right
-		width: 28%
+		padding: 0 13% 10px
diff --git a/sass/_main.sass b/sass/_main.sass
index fed9577..d6df2b3 100644
--- a/sass/_main.sass
+++ b/sass/_main.sass
@@ -62,12 +62,12 @@ body
 	border-bottom: 20px solid #e44d26

 .footer-container,
-.main aside
+.sidebar aside
 	border-top: 20px solid #e44d26

 .header-container,
 .footer-container,
-.main aside
+.sidebar aside
 	background: #f16529

 .title
@@ -100,10 +100,18 @@ nav
  *  MOBILE: Main
  * ==============

-.main
+.main-container
 	padding: 30px 0
+
+.main
 	article h1
 		font-size: 2em
+
+/* =================
+ *  MOBILE: Sidebar
+ * =================
+
+.sidebar
 	aside
 		color: white
 		padding: 0 5% 10px
diff --git a/sidebar.php b/sidebar.php
index 567535e..23f0573 100644
--- a/sidebar.php
+++ b/sidebar.php
@@ -9,8 +9,13 @@
  */
 ?>

-<aside>
-	<h3>aside</h3>
+<div class="sidebar clearfix">
+
+	<aside>
+		<h3>aside</h3>
+
+		<p>Lorem ipsum dolor sit amet, consectetur adipiscing elit. Aliquam sodales urna non odio egestas tempor. Nunc vel vehicula ante. Etiam bibendum iaculis libero, eget molestie nisl pharetra in. In semper consequat est, eu porta velit mollis nec. Curabitur posuere enim eget turpis feugiat tempor. Etiam ullamcorper lorem dapibus velit suscipit ultrices.</p>
+	</aside>
+
+</div>

-	<p>Lorem ipsum dolor sit amet, consectetur adipiscing elit. Aliquam sodales urna non odio egestas tempor. Nunc vel vehicula ante. Etiam bibendum iaculis libero, eget molestie nisl pharetra in. In semper consequat est, eu porta velit mollis nec. Curabitur posuere enim eget turpis feugiat tempor. Etiam ullamcorper lorem dapibus velit suscipit ultrices.</p>
-</aside>
サイドバーウィジェットを使えるように定義する
サイドバーでウィジェットを使うには、サイドバーの定義をしてあげなくちゃいけません。
サイドバーの定義は register_sidebar でできます、さっそく functions.php で定義してあげます。
/**
 * メインのサイドバーを定義
 *
 * @since WordPress 2.2 (2.9.0: description プロパティ追加
 */
register_sidebar( $args = array(
		// サイドバーの名前、2つめの引数でテキストドメインを指定
		'name'          => __( 'メインのサイドバー', 'テーマのテキストドメイン' ),
		// サイドバー呼び出し用のID。小文字かつスペースは無きよう。
		'id'            => 'sidebar-main',
		// サイドバーの説明
		'description'   => '',
		// サイドバーウィジェットに付加されるクラス
		'class'         => '',
		// ウィジェットの前に配置する HTML
		'before_widget' => '<aside id="%1$s" class="widget %2$s">',
		// ウィジェットの後に配置する HTML
		'after_widget'  => '</aside>',
		// ウィジェットタイトルの前に配置する HTML
		'before_title'  => '<h3 class="widgettitle">',
		// ウィジェットタイトルの後に配置する HTML
		'after_title'   => '</h3>' )
);
こんな感じで。説明はコメントで入れつつ。テキストドメインってのはちょっと上でも書いた多言語化するためのやつです。
ひとまずそれはスルー。
定義したサイドバーを sidebar.php で呼び出す
サイドバーを定義したのでめでたくウィジェットを使うことができます。
ということで sidebar.php から呼び出します。
基本的な形はこんな感じ
<?php if ( is_active_sidebar( 'sidebar-main' ) ) : // '***' IDのサイドバーがあるとき ?>
	<?php dynamic_sidebar( 'sidebar-main' ); // '***' のサイドバーを呼び出す?>
<?php else : ?>
	<!-- ウィジェットがないときの処理 -->
<?php endif; ?>
元のソースからの変更はこうなりました。
 <div class="sidebar">

-	<aside>
-		<h3>aside</h3>
+	<?php if ( is_active_sidebar( 'sidebar-main' ) ) : ?>

-		<p>Lorem ipsum dolor sit amet, consectetur adipiscing elit. Aliquam sodales urna non odio egestas tempor. Nunc vel vehicula ante. Etiam bibendum iaculis libero, eget molestie nisl pharetra in. In semper consequat est, eu porta velit mollis nec. Curabitur posuere enim eget turpis feugiat tempor. Etiam ullamcorper lorem dapibus velit suscipit ultrices.</p>
-	</aside>
+		<?php dynamic_sidebar( 'sidebar-main' ); ?>

-</div>
+	<?php else : ?>
+
+		<aside>
+			<h3>aside</h3>
+
+			<p>Lorem ipsum dolor sit amet, consectetur adipiscing elit. Aliquam sodales urna non odio egestas tempor. Nunc vel vehicula ante. Etiam bibendum iaculis libero, eget molestie nisl pharetra in. In semper consequat est, eu porta velit mollis nec. Curabitur posuere enim eget turpis feugiat tempor. Etiam ullamcorper lorem dapibus velit suscipit ultrices.</p>
+		</aside>

+	<?php endif; ?>
+
+</div>
トップページにアクセスしてみると
適当にウィジェットを追加してもう一度見てみます
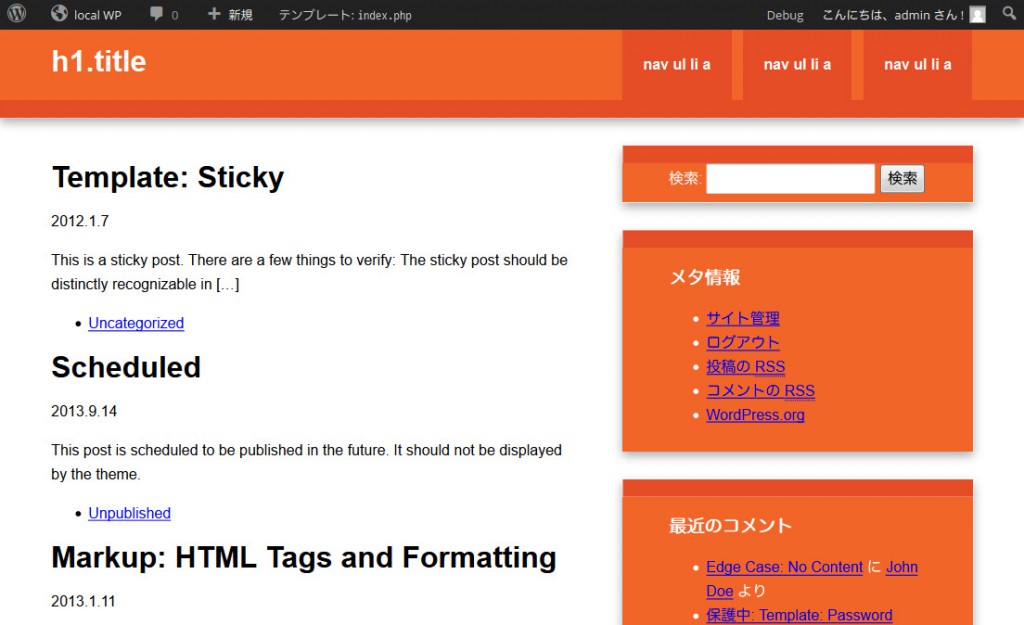
これでトップページの体裁がギリギリ整いましたかね。
index.php しかないのでページ遷移しませんけども(´Д`)
次は第一回目の Theme Check を通して修正入れていきます、ここまでのzipがこちら
つづきます
コメント、してみません?